Showing posts with label BA5 Studio Project. Show all posts

Thursday, 14 February 2013

Textures


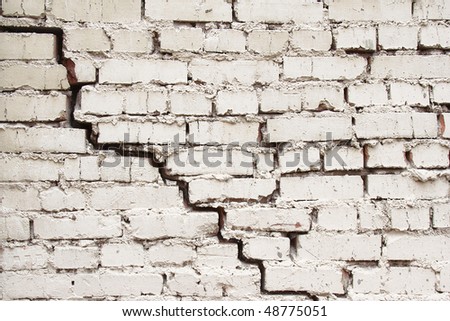
Texture Mood-Board


  • http://www.sillyjokes.co.uk/media/catalog/product/cache/1/image/9df78eab33525d08d6e5fb8d27136e95/i/m/image_6987.jpg
  • http://www.reclaimedbricks.net/images/userimgs/29174/single-brick_64124_1.jpg
  • http://set3113.files.wordpress.com/2010/09/old.jpg
  • http://texturezine.com/wp-content/uploads/2009/10/wrinkled_paper_02.JPG


Here are some links to the concrete-type textures I used;

  • http://www.mayang.com/textures/Architectural/images/Concrete%20and%20Cement/cracked_concrete_closeup_9290254.JPG
  • http://www.mayang.com/textures/Architectural/images/Concrete%20and%20Cement/concrete_wall_in_sunlight_9250041.JPG
  • http://www.mayang.com/textures/Architectural/images/Concrete%20and%20Cement/rough_concrete_closeup_9091061.JPG
  • http://www.mayang.com/textures/Architectural/images/Concrete%20and%20Cement/cracked_concrete_150333.JPG
  • http://www.mayang.com/textures/Architectural/images/Concrete%20and%20Cement/broken_concrete_020073.JPG
  • http://www.mayang.com/textures/Architectural/html/Concrete%20and%20Cement/index.html
  • And for the wood;
  • http://www.mayang.com/textures/Wood/images/Manufactured%20Wooden%20Items/floorboards_2524.JPG
  • http://www.mayang.com/textures/Wood/images/Manufactured%20Wooden%20Items/walnut_wood_100048.JPG
  • http://www.mayang.com/textures/Stone/images/Paving%20Stones/paving_stones_011197.JPG

Wednesday, 13 February 2013

Street Lamp

 Here's a quick screenshot of my attempt to model an intricate streetlamp with the create polygon tool. A valiant attempt - but to no avail - I will endeavor to model it using primitives instead.


I then changed the design I was using  for the lamp to this;
http://ephemeralnewyork.files.wordpress.com/2012/10/patchinplacegaslamptall.jpg
Here are some screenshots of my modeled lamp with ambient occlusion ;


Here's the UVs with the ambient occlusion baked on to it;


Here are the Textures I used on the lamp, followed by the Maps I used;

http://www.mayang.com/textures/Metal/images/Corrugated%20Metal/corrugated_iron_sheet_6190170.JPG


http://www.mayang.com/textures/Metal/images/Corrugated%20Metal/corrugated_030210.JPG


 http://www.mayang.com/textures/Metal/images/Flat%20Metal%20Textures/metal_mould_layer_4082173.JPG


 Specular Map
Normal Map
Both maps have been made using CrazyBump (c)


Screenshots;


All the screen shots above show that the whole lamp was being illuminated by the light inside of it - I eventually managed to fix this by fiddling with all of the light settings. It ended up being the Light FX section which made the most difference - and from there I was able to tweak the colouring and intensity - see screenshots below;


And here is the final lamp render in full;

Monday, 11 February 2013

Street Scene

Reference Images;


Above are photographs I have taken myself of the building I am modeling, below are reference images from the web;


http://www.richmondlibraries.net/rcaimages/44fs.jpg

http://www.ribapix.com/image.php?i=27739&r=2&t=4&x=1&ref=RIBA8117

http://www.limerickcity.ie/Museum/image/1999/199901434.jpg

https://blogger.googleusercontent.com/img/b/R29vZ2xl/AVvXsEgVQC_ZXidm9U0DioqJhlarIWYu4XHlitu4ehZzFvGVljmLMpkvLht4fTknbI953vYS7RBXwEAGHYgQ_l2gK7rN3aeUCyIeLvSmcUx-HE4Ik8Npu1TjbcYFylbamdsyLDEsfEZf35gjzgc/s1600/London,+Regent+Street,+April+2005.jpg

http://ephemeralnewyork.files.wordpress.com/2012/10/patchinplacegaslamptall.jpg

http://ww2today.com/wp-content/uploads/2010/11/Heinkel-III-crashed-on-houses.jpg


Monday, 4 February 2013

Rubble Reference

Here are some more images and their respective URLs which I have used for rubble reference, the wood and panels which feature below, can be seen in my model in the following picture;


http://www.nam.ac.uk/images/online/defeat-west/images/113882.jpg


The bricks in the picture below were also used as inspiration for the above rubble in my model;


http://25.media.tumblr.com/tumblr_m93qgxpNaM1rubozqo1_1280.jpg


http://tony-geraghty.com/images/master/Blitz.jpg


http://ww2today.com/wp-content/uploads/2010/12/Blitz-Londoners-go-back-to-work.jpg


http://farm3.staticflickr.com/2704/4228355381_28dbcbf0e8_b.jpg


https://blogger.googleusercontent.com/img/b/R29vZ2xl/AVvXsEiePG-nioz5yX3-ewnjbJpoRAOkR-HNcJN6g7mQzCvpZw8mGGu6DHJnuGqAsCmpB1cBu5-ZnQfZnhpg13LjZjReKURfasAff3F8j8L0-ZCcBfWvvZMWL6xvTKkltG-ll_VoXaq8vr1DOw/s1600/IMG_2792.JPG


It is almost impossible to find a photograph from the time of the Blitz without  it also depicting a show of camaraderie. One of the reasons I really loved immersing myself in research for the last project (set in 1941) is that it often fills me with patriotic pride at the show of courage and resilience of the British populous of the time. I often ponder on whether our current nation would react with similar vigour.

Wednesday, 30 January 2013

Time for an Update!

Here are the latest screenshots of my building. I am finding it hard to create a bombed out exterior without making the whole thing far too complex. Some more research into how to model for game engines will go a long way I think!


Here is my latest WIP where you can see my development to the rafters and rubble decay.


After showing this model to my friends on Facebook I got some handy feedback - The broken section of the wall (external) was far too jagged - unrealistically so - it was not true to life with how a brick wall would crumble when bombed. Also the same wall needs to be thicker as at the moment it looks unrealistic because it has no depth to it. Here is a revised snapshot of my walls after further research and adjustment in Maya;


Thursday, 24 January 2013

Shattering and Creating Debris

 Shattering things in Maya


This video details the method I used to create the rubble of my building. I started with a cube, and adjusted and moved the vertices in order to create a more realistic pieces of rubble, whilst maintaining their seemingly random appearance.


Here are some screenshots of my rubble;


Robin Silcock

I am a Second Year Games Art and Design student at Norwich University of the Arts. After exploration of a number of roles in my first year, I am now looking to graduate as a 3D Artist with applicable skills in Maya, Mudbox, ZBrush and Photoshop. I understand that my skills in this field are not there yet - but I aim to achieve this goal through consistently working through the programs in my University and Personal Projects. I love to be busy - I have always had a lot of things on my plate since the age of 7 where I successfully balanced school with Ballet, Tap, Horse-Riding, French, Piano and Singing Lessons! In the same fashion, my university schedule is just as hectic and varied; I am a Peer Mentor to first year students, Student Rep for Second Year, and President of the Enterprise Society. Like I said, I love to be busy! I am a Games Hippie - so to speak - I believe that Games if designed and harnessed in the right way, will be able to help solve many of the global issues we have today - even if it starts off in a small way. Just look at the positive effects that Facebook and Twitter have already had... When navigating my blog;
  • Works in Progress - This section is a constantly running account of all my current projects - personal and for university. It will contain reference images and website links and sometimes less than coherent posts, so be prepared!
  • Finished Pieces - This is where you will find my more polished artwork. Looking for help with Maya? Check out the posts tagged "Maya How-To's"