This video explains how to best use the Unfold UV's tool to achieve accurate results each time, due to the current 'slider-tool' and 'automatic' settings seem to produce less than desirable results currently. This does of course depend on what you are unfolding - but this video is definitely worth a watch!

Showing posts with label Maya How-To's. Show all posts
Showing posts with label Maya How-To's. Show all posts
Saturday, 22 June 2013

Friday, 8 February 2013
Ambient Occlusion
Below are the web-tutorials I used to create an Ambient Occlusion Map;
http://www.3dtotal.com/tutorial/maya/video_tutorial_baking_ambient_occlusion/ambient_occlusion_01.php
http://www.3dtotal.com/index_tutorial_detailed.php?id=1107#.URVKKqyEx8E
And here are some screenshots and notes of the process;


Above is a video showing how to bake the ambient occlusion into the Texture Maps.
In short though, if you change your shelf to; Rendering. Then go to Lighting/Shading> then Batch Bake (mental ray) > then click on the options square on the right side of it to open up the option window.

http://www.3dtotal.com/tutorial/maya/video_tutorial_baking_ambient_occlusion/ambient_occlusion_01.php
http://www.3dtotal.com/index_tutorial_detailed.php?id=1107#.URVKKqyEx8E
And here are some screenshots and notes of the process;

Here are two screenshots of my building the first time I baked an Ambient Occlusion Map onto it; notice the grainy appearance of the facade. I think this was due to my settings, because I changed the pixel ratio to a much higher number, and further layed out my UVs and it seemed to solve the issue.

Can you also see that in the above screenshot my wooden 'planks' have a highly pixelated texture on them - this was due to me overlapping their UVs. I rearranged the wood UVs and gave them their own texture map, re-baked it and the problem was fixed. However the rest of the model then had a very grainy effect on it, so I went back once more and adjusted the settings.

Below is a final screenshot of my ambient occlusion-ed building;


Tutorial Time!
In short though, if you change your shelf to; Rendering. Then go to Lighting/Shading> then Batch Bake (mental ray) > then click on the options square on the right side of it to open up the option window.

BEFORE YOU DO THIS MAKE SURE YOU SAVE AS.... "AMBIENT OCCLUSION BAKE" OR SOMETHING, JUST IN CASE THE WORST HAPPENS.
1) Make sure that you have selected all the objects you wish to be included in your amb. occ. bake. And that this drop-down menu does in fact read: Selected.
2) Make sure that you are baking to the Texture, and not something else.
3) Make sure that this check box is checked, so that you can continue to change the options. (4 onward)
4) Make sure that this drop-down menu reads Occlusion.
5) Set the occlusion rays to something decent like 65 (which is the preset) setting it to 100 will make your occlusion map more crisp, but it may break your computer in the process!
6) Set up the resolution to match the size of texture you plan on using for your diffuse maps.
7) Set the file format option to something easy to work with. Choosing JPEG here will make it all run through faster, but you may lose some quality.
8) Click Convert and Close.....and wait in anticipation. When the batch bake is complete your scene will change and it will show the Amb Occ Map. (eg: white with grey/black shading)
Finally, here's a tutorial suggested by Erick Hurtado which includes Ambient Occlusion, but goes much further;
Finally, here's a tutorial suggested by Erick Hurtado which includes Ambient Occlusion, but goes much further;
http://youtu.be/ybRe-9Mq2eo

Saturday, 12 May 2012
Maya Modelling Tool Explanation 2
Right lets keep going with this!
 Cut Faces Tool:
This tool allows you to draw a line across the whole shape and slice through it, as shown below. This is useful if you want to separate two distinct sections of a model, cutting through all of the shape. It stops you from having to individually trace a line around it.

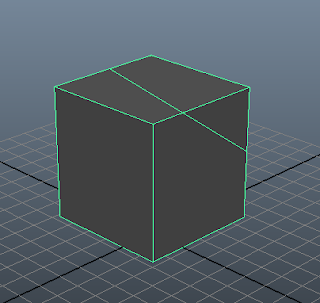
 Inter-active Split Tool: This tool allows you to draw an edge onto a face at any angle. This is good for fine, awkward details but as I have learned it can lead to problems later on with geometry, tri's and your UV Maps.


 Merge Vertices Tool: This allows you to highlight several verts and make them merge into a shared centre effectively taking 4 or 5 or more verts and making them into one.


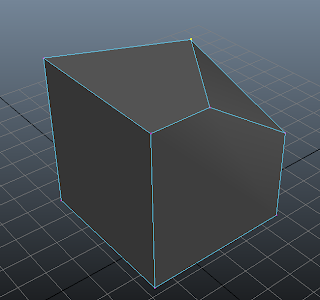
This tool allows you to draw a line across the whole shape and slice through it, as shown below. This is useful if you want to separate two distinct sections of a model, cutting through all of the shape. It stops you from having to individually trace a line around it.

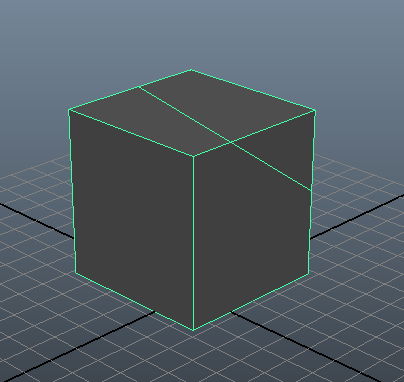


These highlighted edges all from the merged vertex shown below. 3 into 1 in this instance.

Tuesday, 8 May 2012
Maya for Games
I thought I would introduce my latest endeavor in keeping my Maya 'skills' to the forefront of my mind by working my way steadily through Michael Ingrassia's kindly instructive book; "Maya for Games: Modeling and Texturing Techniques with Maya and Mudbox"


http://www.cgsoft.ru/uploads/posts/2009-05/1242737875_michael-ingrassia-maya-for-games.jpg
The first lessons I have learned today are some fun(!) new hot keys to get tapping at to switch between model viewing options in Maya;
4 - Wire-frame Mode
5 - Shaded Mode
6 - Textured Mode
7 - Lit Mode
These would have been particularly useful during my light and texture shading stage of my Venetian Door (remember that old chestnut?) as I was having to re-render my model each time I wanted to see the effect of the new lighting I had put in place. At the time I had a feeling it was not the efficient way to do things, but with no-known alternative and a clock ticking persistently at my heels, I chose to soldier on and finish without questions.
As I peruse the introductory chapter of Ingassia's book, waves of relief flow over me as more and more items, icons, tools and menus are mentioned which I have at-least a brief knowledge of and I feel less dominated by the thought of once again trying to break a chink in the intimidating chain-mail of Maya.
Tuesday, 24 April 2012
Maya Modeling Tool Explanation 1
Sucess at last! After a good session on Friday afternoon with Kai Creedon in the media lab, I am now much more familiar with the modelling tools that get me sarted with the basics in Maya.
I will do a quick summary of the essential modelling tools I have learnt this week;
I am now familiar enough with the transform shortcuts; W, E, R that I instinctively use them whilst modelling to further manipulate my work. I also am now confidently interchanging between Face/Edge/Vertex/Object Selection Modes via the right-click function. I am not yet that confident with the hold-spacebar-hotbox-menu!

I am starting to better understand the many options available in the Channel Box and Attribute Editor.

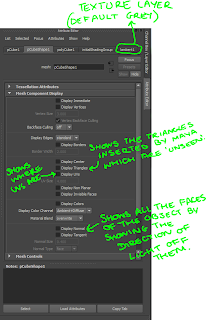
Below are some examples of the different views that you can choose from. The normals and centres tool helps you to identify 'Collapsed Faces' and hidden layers of faces which often occur from 'Double Extrusion'.


I find myself modelling in the 4-screen view to make sure that my door is properly aligned from all angles- something I wouldn't have found as easy to comprehend 2 weeks ago.

 Merge Vertex Tool:
This tool can be used to join and combine two vertices. For example you could join the vertices of a cube to form a square based pyramid. I have used this tool often when attempting to 'clean up' my geometry.See cube example below;

Bevel:
When an edge (or several edges) are selected, you can use the bevel tool to add a face which is at an angle to where the original edge was. See cube example below;


 Bridge:
By selecting two edges which are opposite each other, you can 'Bridge the Gap' using the bridge tool. See Example Cube Below;
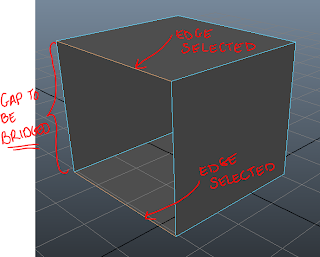
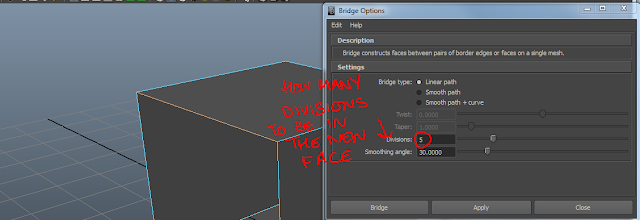
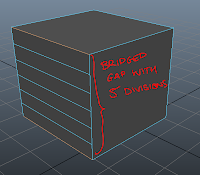
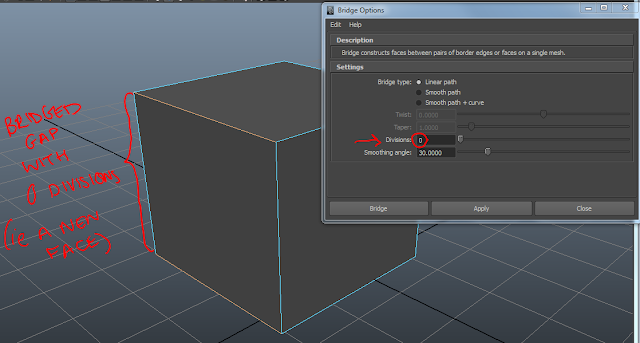
 Append Polygon Tool:
The Append Polygon tool can be used to fill gaps much like the bridge tool, but is easier to use if the hole you need filling is an irregular shape. You use the cursor to click on the 4 (or more/less) corners going around the shape in an ANTI CLOCKWISE direction. If you go clockwise you will create problems with the face facing inwards etc.


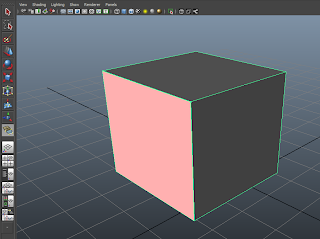
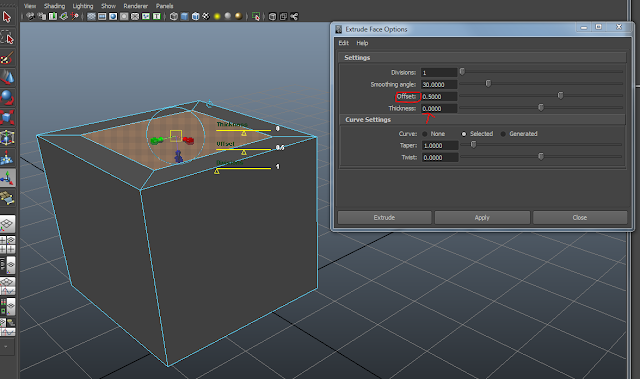
 Extrude Tool:

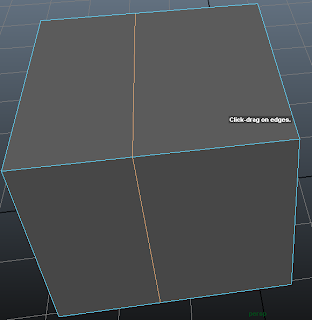
 Insert Edge Loop Tool:
Insert Edge Loop Tool allows you to add in extra 'loops' of geometry to an object,

I will do a quick summary of the essential modelling tools I have learnt this week;
I am now familiar enough with the transform shortcuts; W, E, R that I instinctively use them whilst modelling to further manipulate my work. I also am now confidently interchanging between Face/Edge/Vertex/Object Selection Modes via the right-click function. I am not yet that confident with the hold-spacebar-hotbox-menu!

I am starting to better understand the many options available in the Channel Box and Attribute Editor.


Below are some examples of the different views that you can choose from. The normals and centres tool helps you to identify 'Collapsed Faces' and hidden layers of faces which often occur from 'Double Extrusion'.

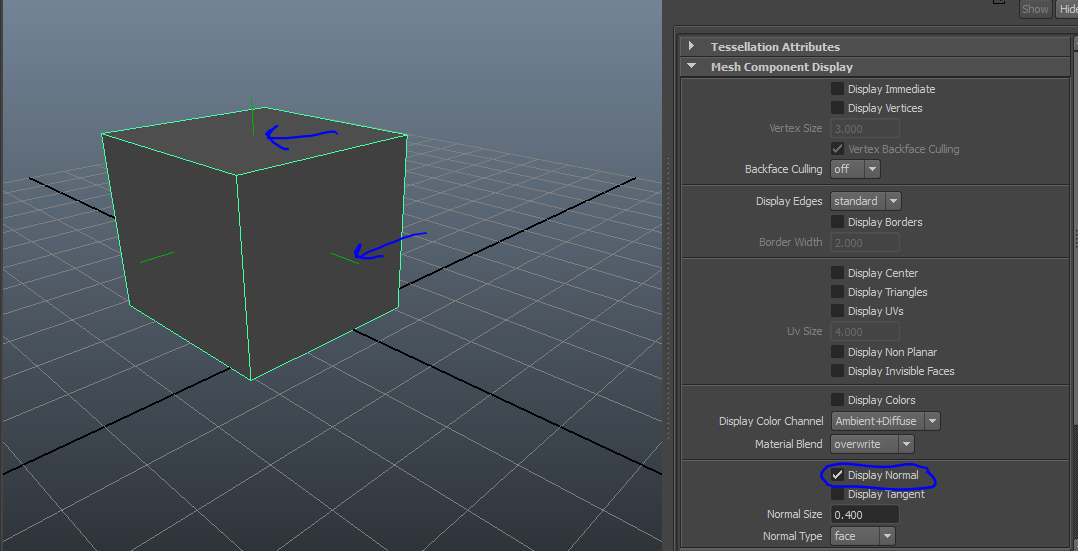
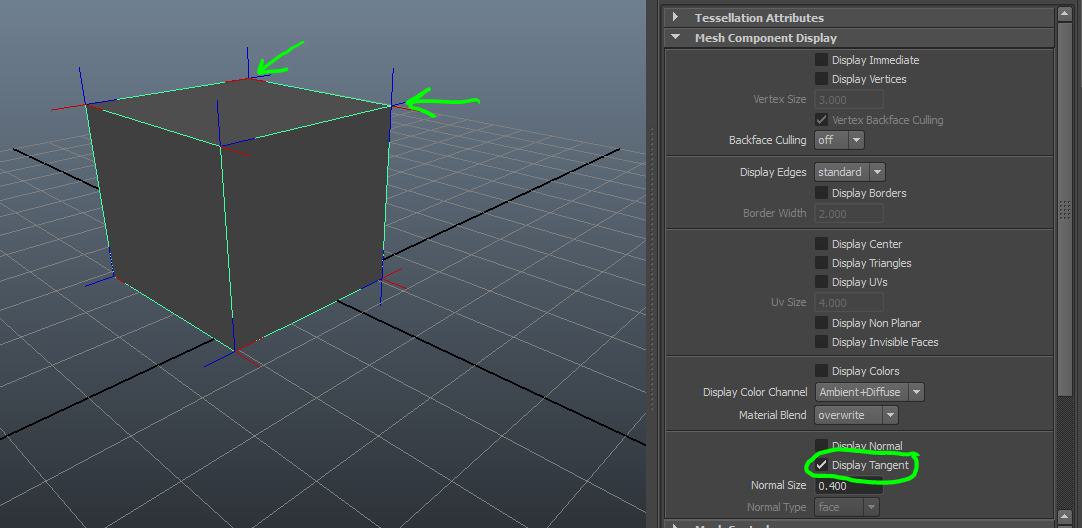

I find myself modelling in the 4-screen view to make sure that my door is properly aligned from all angles- something I wouldn't have found as easy to comprehend 2 weeks ago.

This tool can be used to join and combine two vertices. For example you could join the vertices of a cube to form a square based pyramid. I have used this tool often when attempting to 'clean up' my geometry.See cube example below;
 |
| Once one vertex is selected in red, you drag across to the vertex you wish to be merged with. |
 |
| The vertices then snap together and form one merged vertex. This means the cube now has two faces with only three sides. |
Bevel:
When an edge (or several edges) are selected, you can use the bevel tool to add a face which is at an angle to where the original edge was. See cube example below;

 |
| This is the cube after it has been Bevelled along the selected edges (in orange above) using the settings shown above. |
 |
| The Segments option on the Bevel Settings has been changed from 1 to 5. Below is the result of such a change. |
 Bridge:
By selecting two edges which are opposite each other, you can 'Bridge the Gap' using the bridge tool. See Example Cube Below;
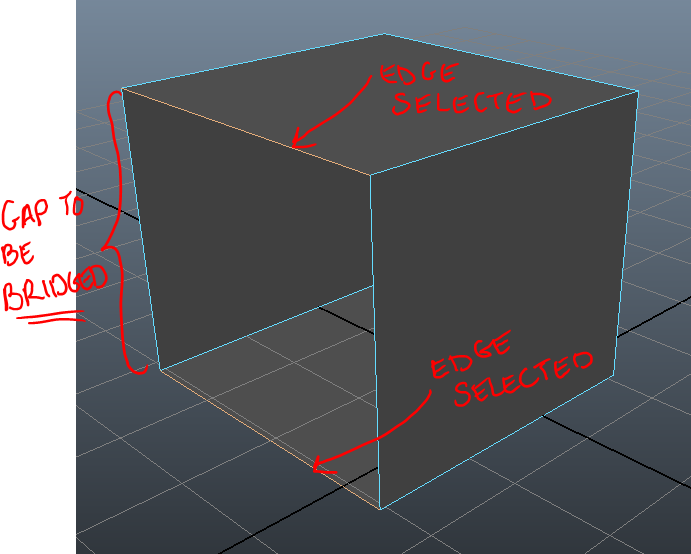


The Append Polygon tool can be used to fill gaps much like the bridge tool, but is easier to use if the hole you need filling is an irregular shape. You use the cursor to click on the 4 (or more/less) corners going around the shape in an ANTI CLOCKWISE direction. If you go clockwise you will create problems with the face facing inwards etc.


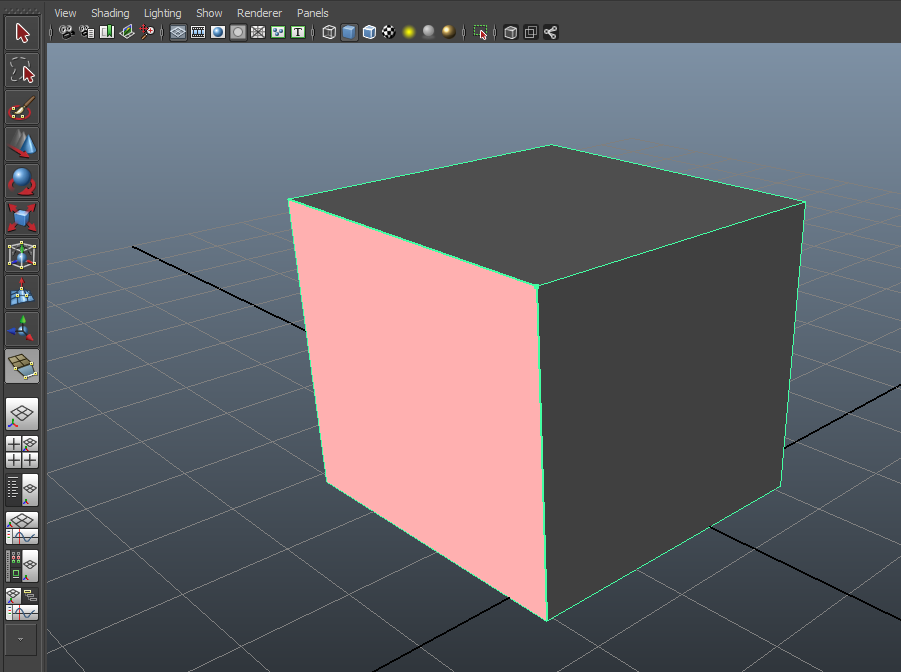 Extrude Tool:
Extrude allows you to pull outward faces from an existing face. It also allows you to add in geometry to a face. Offset adds in extra divisions (and looks similar to a photo-frame) and Thickness determines the thickness of the new face (ie how far you want it to extrude outwards)

 Insert Edge Loop Tool:
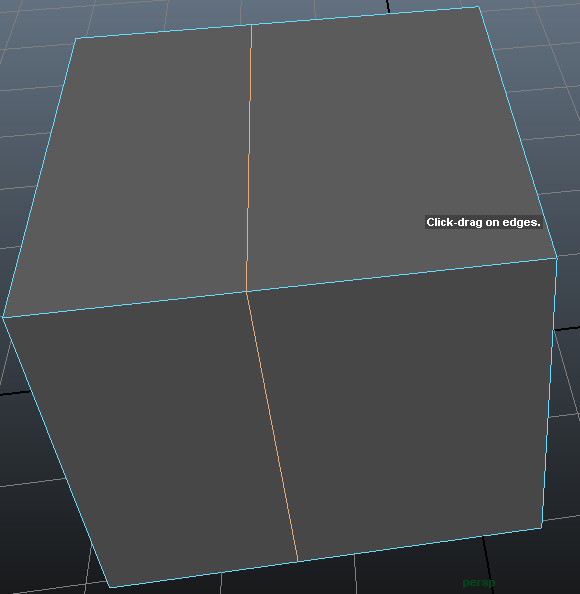
Insert Edge Loop Tool allows you to add in extra 'loops' of geometry to an object,

Monday, 19 March 2012
Clean Modeling Tips
Various Tips for Modeling in Maya, and keeping your Geometry Clean
- 'Non-Manifold Geometry'; Shared faces or edges within your object create invisible geometry which effectively has no use, and will induce Maya to crash. Basically - if it cannot be seen from the outside of the model (where the player will be) then you should get rid of it!
- In Maya an object doesn't not have any mass until it is a combination of x y and z. If it is only two of these dimensions it exists as a plane and not an object. When a plane exists in Maya it will only be visible from one side. This can be a positive thing, and a negative thing when modeling depending on what your desired model outcome is.
- Maya only worries about what is facing outward. Not what is facing inward. To check if you have inward faces, try viewing the Normals. (If this term is new to you, watch the video below)
- You can pivot objects in component mode located about the shelf icons to the right of the drop down menu for modelling. The component mode Icon is on the far right, the middle Icon is Object mode;

- If you hold down the x key, the cursor changes and it means that objects or points will snap to the grid. This helps with proportion and scaling.
- If you hold down the c key it will snap to a curve or an edge.
- If you hold down the v key it will snap to vertices or edges.
- By pressing Insert (the 0 numberpad key for a mac) whilst an object is selected, you are able to move that object's axes/pivot point manually. Press Insert again to exit this mode.
- To combine two objects in maya; select both objects (select > object > shift key held down) then right click and select combine.
- Try not to have infinitely small edges or points. Everything needs to have geometry otherwise it won't work in UDK.
- Watch out for unwanted geometry being created as you model in Maya, especially when extruding.
- When in Vertex Selection Mode, if you select the whole of your model and hit delete you can eliminate any unwanted vertices which are not connected to edges (floating vertices). Use caution when using this technique as sometimes vertices can be deleted unintentionally and your model will be altered.
- Merge objects to eliminate in between geometry. Mesh>Cleanup
- For more modeling clean-up techniques, YouTube will serve you well;
Topics for further Research
- Shading effects and Backface Culling options.
- Look into Alchemy.org
- Massive Black
- David Revoy
Subscribe to:
Posts (Atom)