Sucess at last! After a good session on Friday afternoon with Kai Creedon in the media lab, I am now much more familiar with the modelling tools that get me sarted with the basics in Maya.
I will do a quick summary of the essential modelling tools I have learnt this week;
I am now familiar enough with the transform shortcuts; W, E, R that I instinctively use them whilst modelling to further manipulate my work. I also am now confidently interchanging between Face/Edge/Vertex/Object Selection Modes via the right-click function. I am not yet that confident with the hold-spacebar-hotbox-menu!
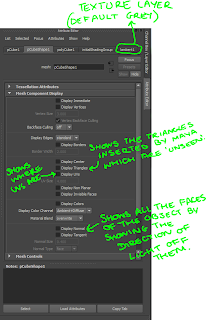
I am starting to better understand the many options available in the Channel Box and Attribute Editor.
Below are some examples of the different views that you can choose from. The normals and centres tool helps you to identify 'Collapsed Faces' and hidden layers of faces which often occur from 'Double Extrusion'.
I find myself modelling in the 4-screen view to make sure that my door is properly aligned from all angles- something I wouldn't have found as easy to comprehend 2 weeks ago.
Merge Vertex Tool:
This tool can be used to join and combine two vertices. For example you could join the vertices of a cube to form a square based pyramid. I have used this tool often when attempting to 'clean up' my geometry.See cube example below;

Bevel:
When an edge (or several edges) are selected, you can use the bevel tool to add a face which is at an angle to where the original edge was. See cube example below;
 Bridge:
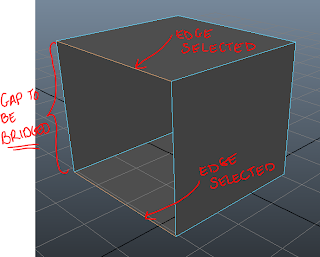
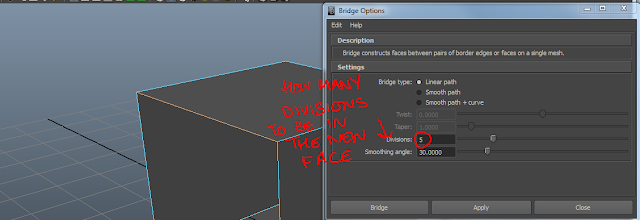
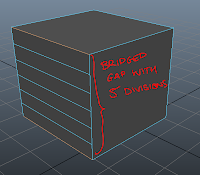
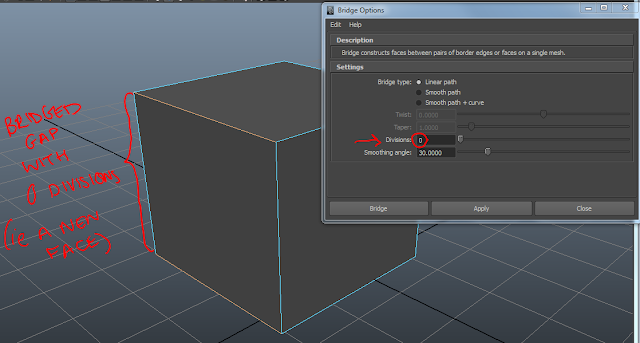
By selecting two edges which are opposite each other, you can 'Bridge the Gap' using the bridge tool. See Example Cube Below;
Append Polygon Tool:
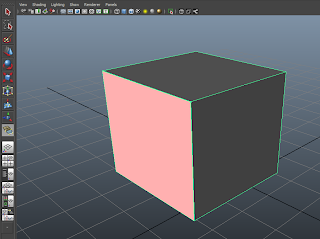
The Append Polygon tool can be used to fill gaps much like the bridge tool, but is easier to use if the hole you need filling is an irregular shape. You use the cursor to click on the 4 (or more/less) corners going around the shape in an ANTI CLOCKWISE direction. If you go clockwise you will create problems with the face facing inwards etc.
 Insert Edge Loop Tool:
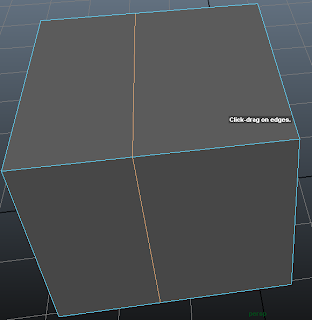
Insert Edge Loop Tool allows you to add in extra 'loops' of geometry to an object,
I will do a quick summary of the essential modelling tools I have learnt this week;
I am now familiar enough with the transform shortcuts; W, E, R that I instinctively use them whilst modelling to further manipulate my work. I also am now confidently interchanging between Face/Edge/Vertex/Object Selection Modes via the right-click function. I am not yet that confident with the hold-spacebar-hotbox-menu!
I am starting to better understand the many options available in the Channel Box and Attribute Editor.
Below are some examples of the different views that you can choose from. The normals and centres tool helps you to identify 'Collapsed Faces' and hidden layers of faces which often occur from 'Double Extrusion'.
I find myself modelling in the 4-screen view to make sure that my door is properly aligned from all angles- something I wouldn't have found as easy to comprehend 2 weeks ago.
Merge Vertex Tool:
This tool can be used to join and combine two vertices. For example you could join the vertices of a cube to form a square based pyramid. I have used this tool often when attempting to 'clean up' my geometry.See cube example below;
 |
| Once one vertex is selected in red, you drag across to the vertex you wish to be merged with. |
 |
| The vertices then snap together and form one merged vertex. This means the cube now has two faces with only three sides. |
Bevel:
When an edge (or several edges) are selected, you can use the bevel tool to add a face which is at an angle to where the original edge was. See cube example below;
 |
| This is the cube after it has been Bevelled along the selected edges (in orange above) using the settings shown above. |
 |
| The Segments option on the Bevel Settings has been changed from 1 to 5. Below is the result of such a change. |
By selecting two edges which are opposite each other, you can 'Bridge the Gap' using the bridge tool. See Example Cube Below;
Append Polygon Tool:
The Append Polygon tool can be used to fill gaps much like the bridge tool, but is easier to use if the hole you need filling is an irregular shape. You use the cursor to click on the 4 (or more/less) corners going around the shape in an ANTI CLOCKWISE direction. If you go clockwise you will create problems with the face facing inwards etc.
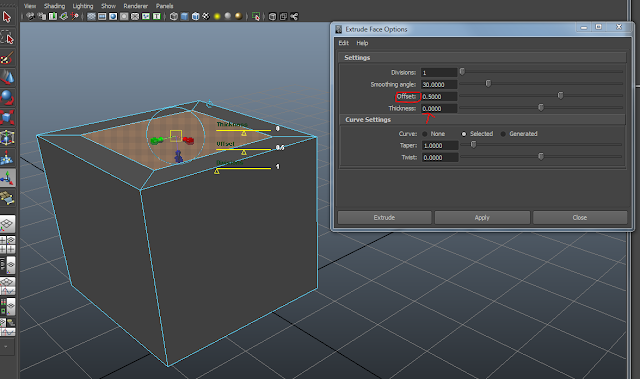
Extrude allows you to pull outward faces from an existing face. It also allows you to add in geometry to a face. Offset adds in extra divisions (and looks similar to a photo-frame) and Thickness determines the thickness of the new face (ie how far you want it to extrude outwards)
Insert Edge Loop Tool allows you to add in extra 'loops' of geometry to an object,








No comments:
Post a Comment